The EU’s GDPR regulation is approaching fast. As we are in the middle of the race for data protection compliancy, it would be great to get yourself a bit more familiar with all the useful macros in Kentico 11 that can be used to make your quest for becoming GDPR compliant much easier.
If you have been reading our Kentico blog posts for some time, you might have already come across a few of our articles describing Kentico 11 macros and how they can be leveraged in many interesting scenarios. However, as there are lots of them, it is time to highlight some of the macros more to get a clearer view of their capabilities, and tackle GDPR challenges with more clarity in mind.
Most of the time, you will use the following two types of GDPR-related macro throughout Kentico 11 EMS:
- The macro for displaying the shorter or longer version of a specified consent
- The macro for checking if a contact agreed to a selected consent
The Macro for Displaying the Shorter or Longer Version of a Consent
This is a self-explanatory macro type that simply loads the specified consent defined in the system, and displays its shorter or longer version. Such a macro can be used in many places on a website. For example, it could be used to display the longer version of the consent on a privacy page.
The macro syntax is as follows:
{%GlobalObjects.Consents.[ConsentCodeName].GetConsentText().ShortText% } – displays the short version of the consent
{%GlobalObjects.Consents.[ConsentCodeName].GetConsentText().FullText% } – displays the longer version of the consent
As you can see, they differ only in their last bit – ShortText and FullText. So, if your consent that is defined in the Data Protection app in Kentico 11 has the codename NewsletterSubscriptionConsent, and you want to display its longer text version (full text), the macro would look like this:
{%GlobalObjects.Consents.NewsletterSubscriptionConsent.GetConsentText().FullText% }
If you needed to display only a short version, you would change the macro’s last bit to ShortText. Simple, isn’t it?
Nevertheless, in some cases, you might also want to display the name of the actual consent to make it clear to which consent the displayed long (or short) version of the text belongs. Fortunately, that is easy to do with the macro as well. You just need to use the ConsentDisplayName instead of the GetConsentText(). With that in mind, you would write the macro like this:
{%GlobalObjects.Consents.NewsletterSubscriptionConsent.ConsentDisplayName% }
By combining the macro variants above, you can easily display the consent’s information on your website and focus on tackling other important aspects of GDPR compliance.
The Macro for Checking If a Contact Agreed to a Macro
You need to be aware of who has agreed with your consent, and who hasn’t yet. As long as you use our Form control for tracking consent agreements, you can really on the following macro that checks if the current contact agreed with a given consent or not:
{%OnlineMarketingContext.CurrentContact.AgreedWithConsent(“ConsentCodeName”)% }
In other words, you will take advantage of the online marketing context to check if the current contact (visitor) agreed with a consent of a specific code name.
So, if I use the same code name of the consent as in the previous macro type for displaying the consent’s text, it will look like this:
{%OnlineMarketingContext.CurrentContact.AgreedWithConsent(“NewsletterSubscriptionConsent”)% }
This macro can be used in many ways. For example, for defining whether widgets or web parts should be shown to the current contact or not.
Another great use includes the creation of condition-based contact groups. Such groups would contain only the contacts who agreed with a specified consent, and could be used further in content personalization, scoring rules, personas, or email marketing.
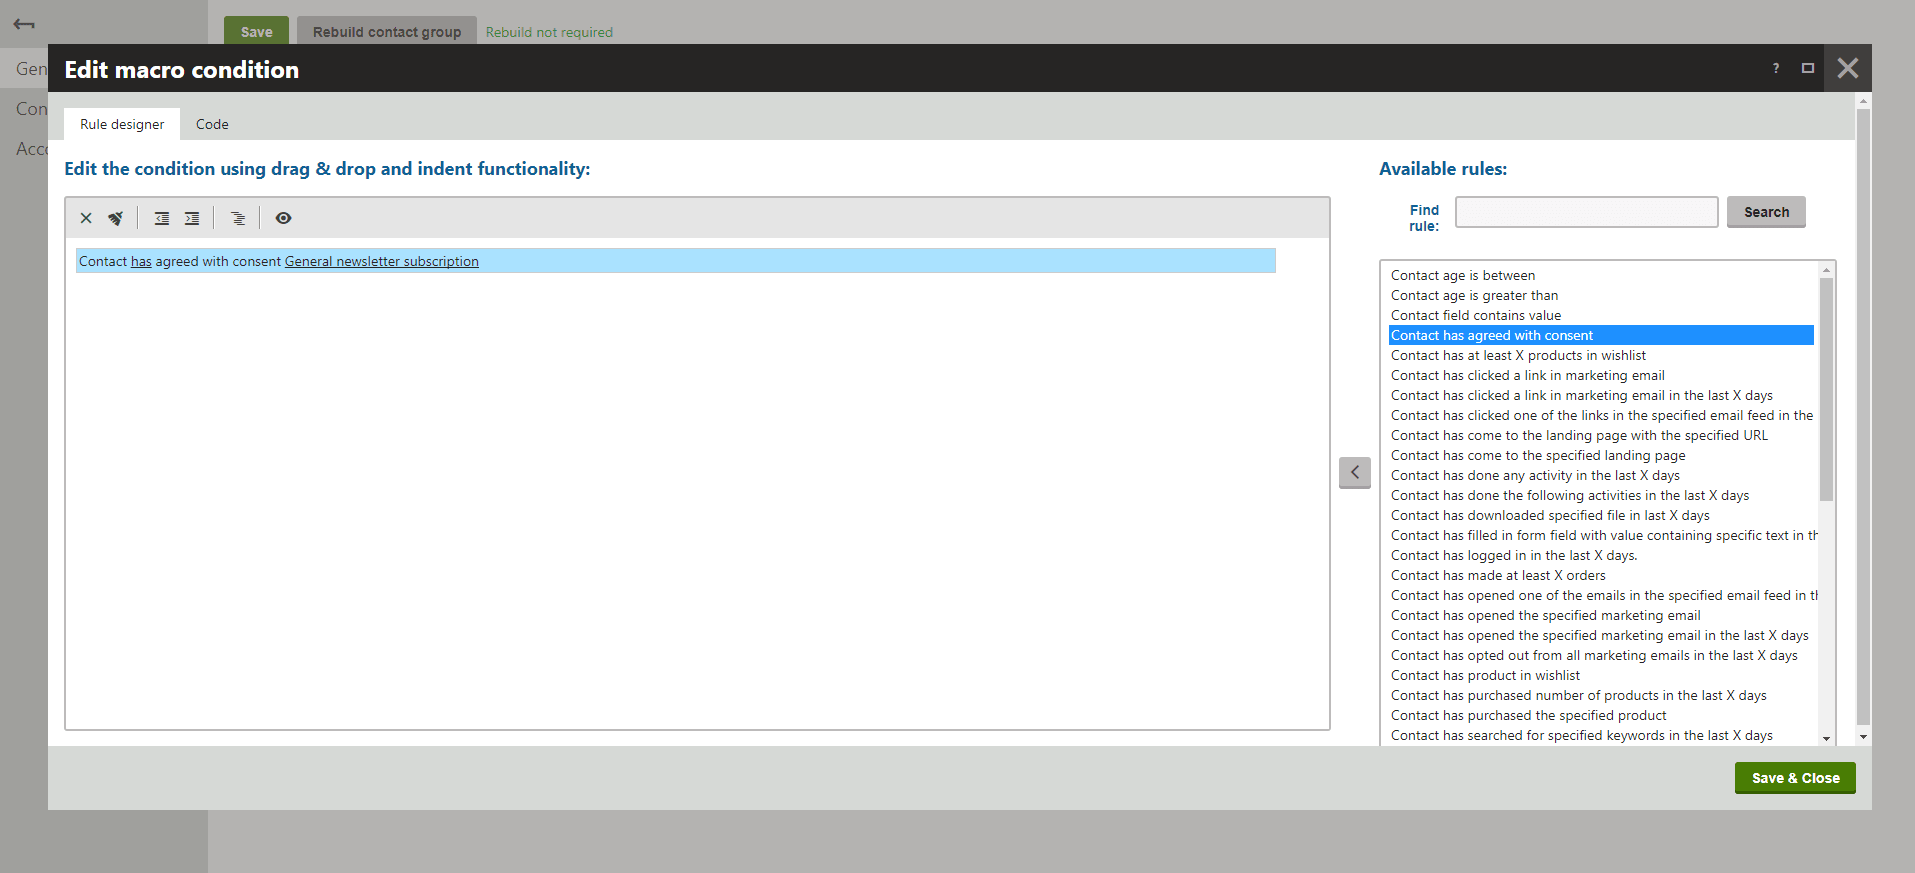
Furthermore, to make your life even easier, there is a macro rule named Contact has agreed with consent, which can be quickly selected from within Kentico 11’s macro rule designer. It does the same job as the macro, but is easier to use as you don’t have to remember the macro syntax. All you need to do is select it from the Rule designer, and that’s it:
This macro rule and the macros mentioned above are your ultimate tools for staying on top of the race for GDPR compliance.
They can be freely combined with other macros or macro rules to create complex decision-making rules.
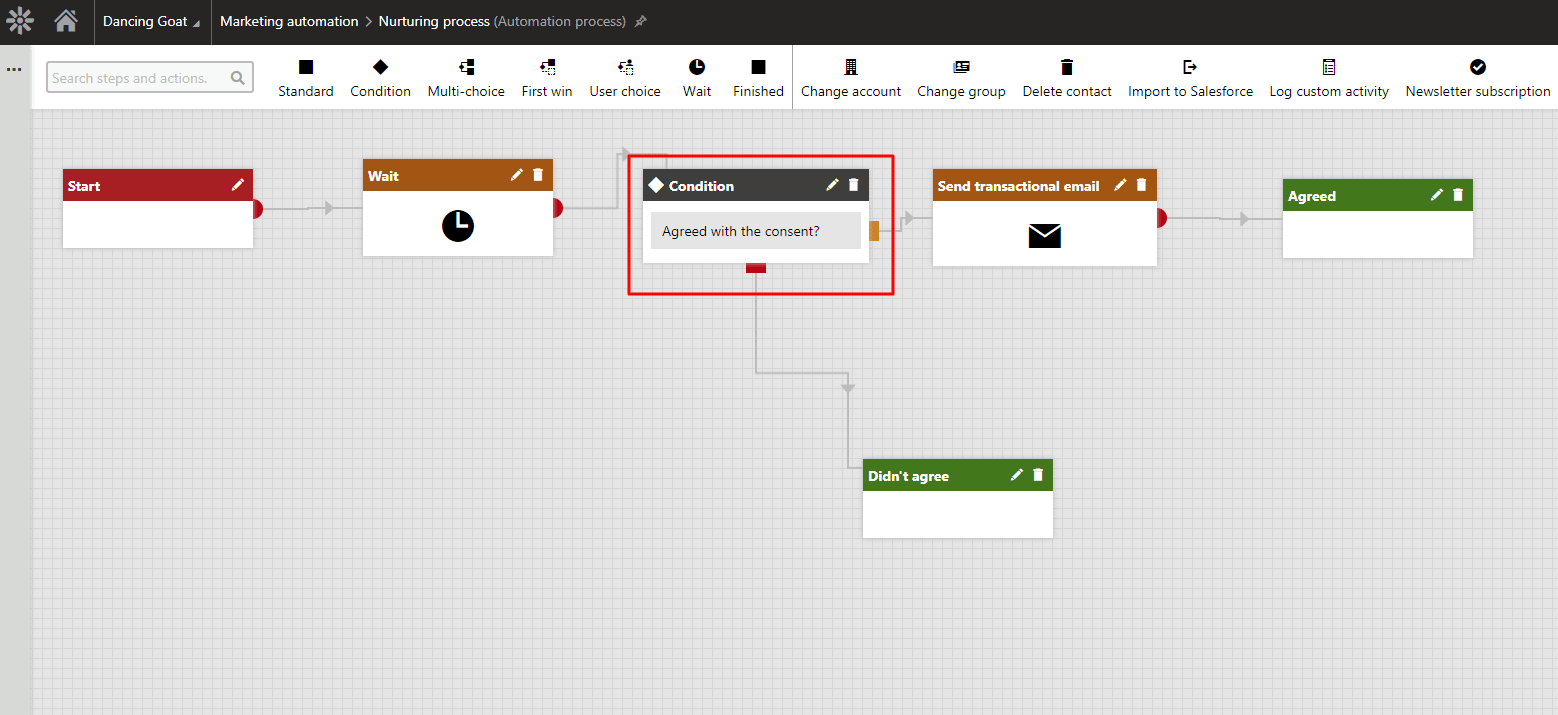
This is particularly helpful in marketing automation. For example, if you have a nurturing process set up to send emails to your contacts, you should always check that the contact agreed with a given consent, and still agrees. This is especially helpful if you need to adjust your current marketing automation processes. You just sneak in one extra Condition step using the macro rule to check if the contacts agreed with a consent, and if not, finish the process:
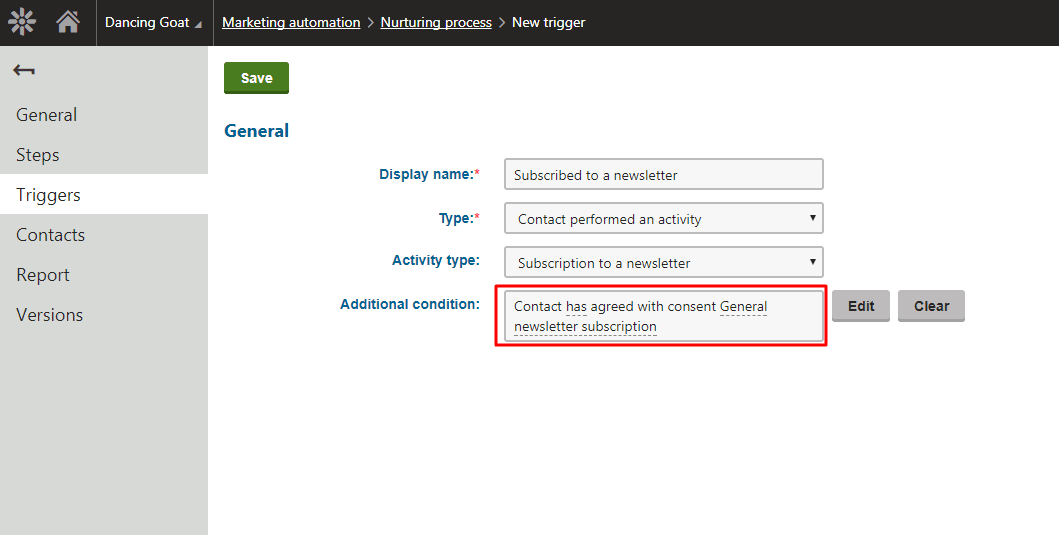
The same could be done with a marketing automation trigger in which you could use the macro rule as well to not start the process for contacts who didn’t agree with a specific contact:
All the mentioned macros (and macro rules) above are the ones you will frequently use in Kentico 11 EMS. As soon as you start using them for your advanced online marketing scenarios, I am sure you will quickly start remembering them.
How are your GDPR preparations going? Are there any other macros you would appreciate regarding data protection? Let us know in comments!


